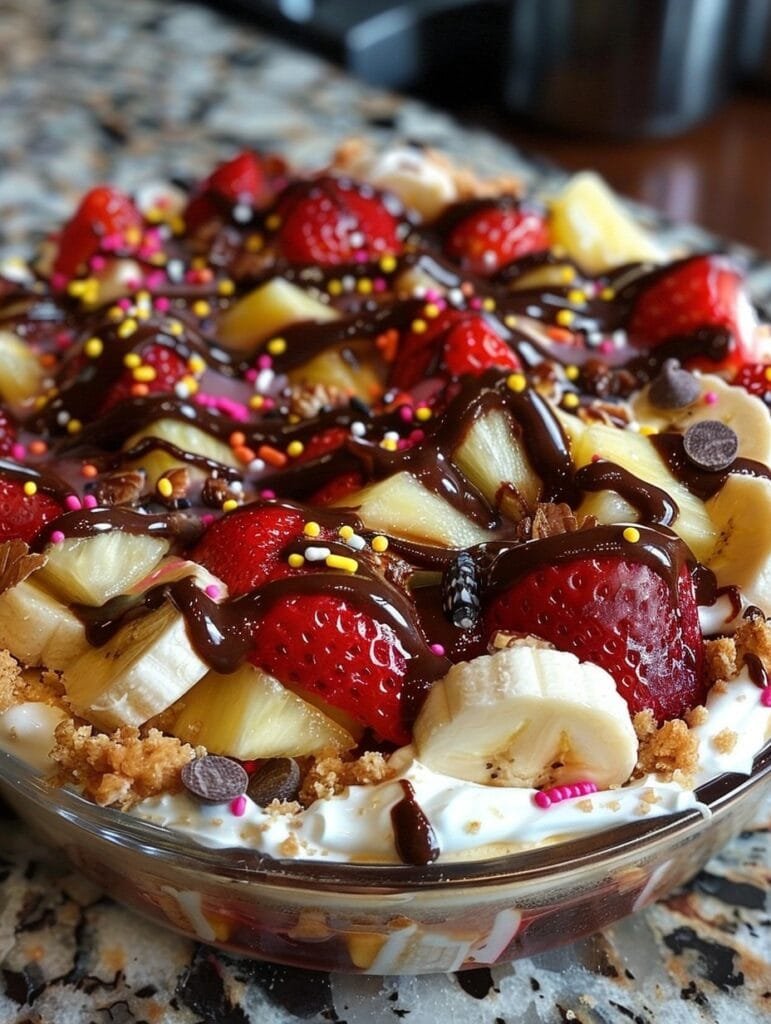
No-Bake Banana Split Dessert: A Sweet and Easy Treat for Any Occasion
When it comes to indulgent, no-fuss desserts, No-Bake Banana Split Dessert is the perfect solution. This decadent treat combines all the classic flavors of a banana split—creamy vanilla pudding, fresh bananas, tangy pineapple, rich chocolate sauce, and whipped cream—but without the hassle of turning on the oven. Perfect for summer parties, holiday gatherings, or just when you’re craving something sweet, this dessert is sure to impress your family and friends.
In this article, we’ll guide you through how to create this easy and scrumptious dessert that’s a guaranteed crowd-pleaser. Let’s dive in!
Why You’ll Love No-Bake Banana Split Dessert
- Super Simple: With just a handful of ingredients and no baking required, this dessert comes together quickly and effortlessly.
- Perfect for Hot Days: No need to heat up your kitchen with the oven—just assemble the ingredients and refrigerate. It’s a refreshing treat for warm weather.
- Customizable: While this recipe stays true to the classic banana split, you can easily add your favorite toppings or tweak the flavors to suit your preferences.
- A Showstopper: Layers of colorful fruit, creamy filling, and whipped topping make for a visually stunning dessert that’s as beautiful as it is delicious.
- Feeds a Crowd: This dessert is perfect for parties, potlucks, or family gatherings. It can easily be made in a large pan and serves several people, making it ideal for feeding a crowd.
Ingredients for No-Bake Banana Split Dessert
Here’s what you’ll need to create this easy and indulgent dessert:
- 1 box (about 9 oz) graham cracker crumbs
- 1/4 cup unsalted butter, melted
- 2 ripe bananas, sliced
- 1 can (20 oz) crushed pineapple, drained (save the juice for another use, like smoothies)
- 1 package (3.4 oz) instant vanilla pudding mix
- 2 cups cold milk
- 1 container (8 oz) whipped topping (like Cool Whip)
- 1/2 cup chocolate syrup (or more, depending on how chocolaty you like it)
- Chopped nuts (like walnuts or pecans, optional)
- Maraschino cherries, for garnish (optional)
How to Make No-Bake Banana Split Dessert
Step 1: Make the Crust
Start by preparing the crust. In a medium-sized bowl, combine the graham cracker crumbs with the melted butter. Stir until the crumbs are well-coated with the butter, and the mixture holds together when pressed.
Press the graham cracker mixture into the bottom of a 9×13-inch baking dish (or a similar sized pan). Use the back of a spoon to press the crust down firmly, ensuring an even layer. Place the crust in the refrigerator to chill and set while you prepare the other layers.
Step 2: Prepare the Pudding Layer
In a separate bowl, whisk together the instant vanilla pudding mix and cold milk. Follow the instructions on the pudding package to make sure it thickens properly. Once mixed, let it sit for a few minutes until it sets up to the right consistency.
After the pudding has thickened, carefully spread it evenly over the chilled graham cracker crust. You want a smooth, even layer of pudding covering the crust.
Step 3: Add the Bananas and Pineapple
Next, layer the sliced bananas evenly over the pudding. Then, add the drained crushed pineapple on top of the bananas. The pineapple adds a tangy sweetness that perfectly complements the rich, creamy layers of pudding and graham crackers.
Step 4: Add the Whipped Topping
Now, spread the whipped topping over the fruit layer. Be sure to spread it evenly, covering all the fruit and giving the dessert a smooth, fluffy finish. This layer is what gives the dessert its signature light, creamy texture.
Step 5: Drizzle with Chocolate Sauce
For the classic banana split flavor, drizzle the chocolate syrup generously over the top of the whipped topping. You can add as much or as little as you like, depending on your chocolate preferences. This step gives the dessert a delicious chocolatey richness that makes it irresistible.
Step 6: Garnish and Chill
To finish, add any optional toppings such as chopped nuts (walnuts or pecans work great) and maraschino cherries. These add both texture and a fun, festive touch to your dessert.
Now, cover the dessert with plastic wrap or aluminum foil and place it in the refrigerator for at least 2-3 hours, or preferably overnight. This allows the layers to set and ensures that the flavors meld together perfectly.

